This setup lets ThankYou Analytics automatically write data to your Snowflake environment. Once it’s configured, you’ll be able to turn on automatic exports from the ThankYou app — check out our dedicated guide to learn more.

This setup has 4 steps and takes about 5 minutes.
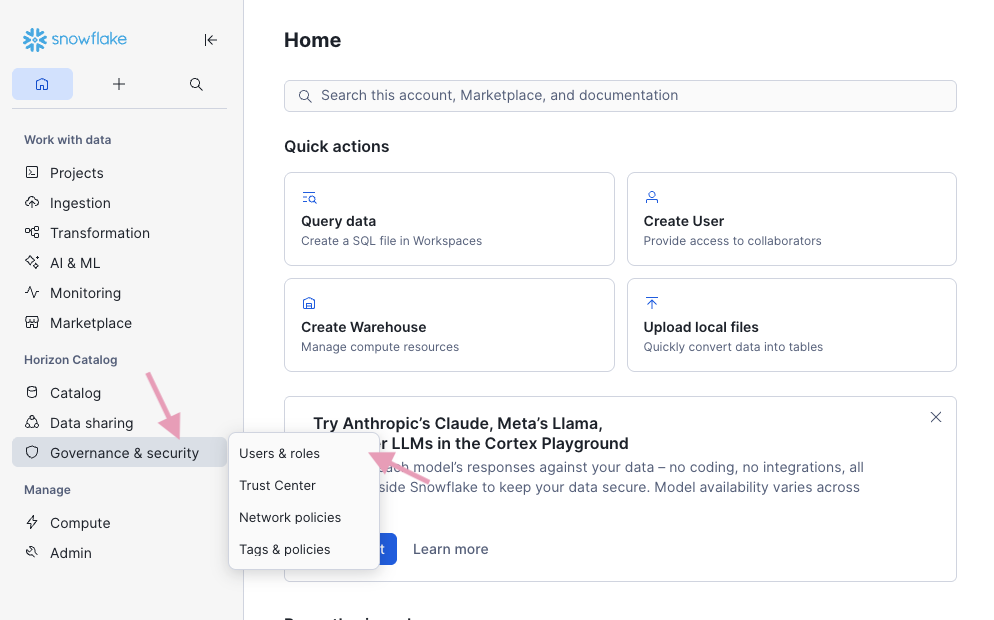
Snowflake doesn’t include a predefined role with the exact privileges required, so you must create a custom role.
Go to your Snowflake app (URL like app.snowflake.com/…)
Follow this path Home > Governance & security > Users & Roles
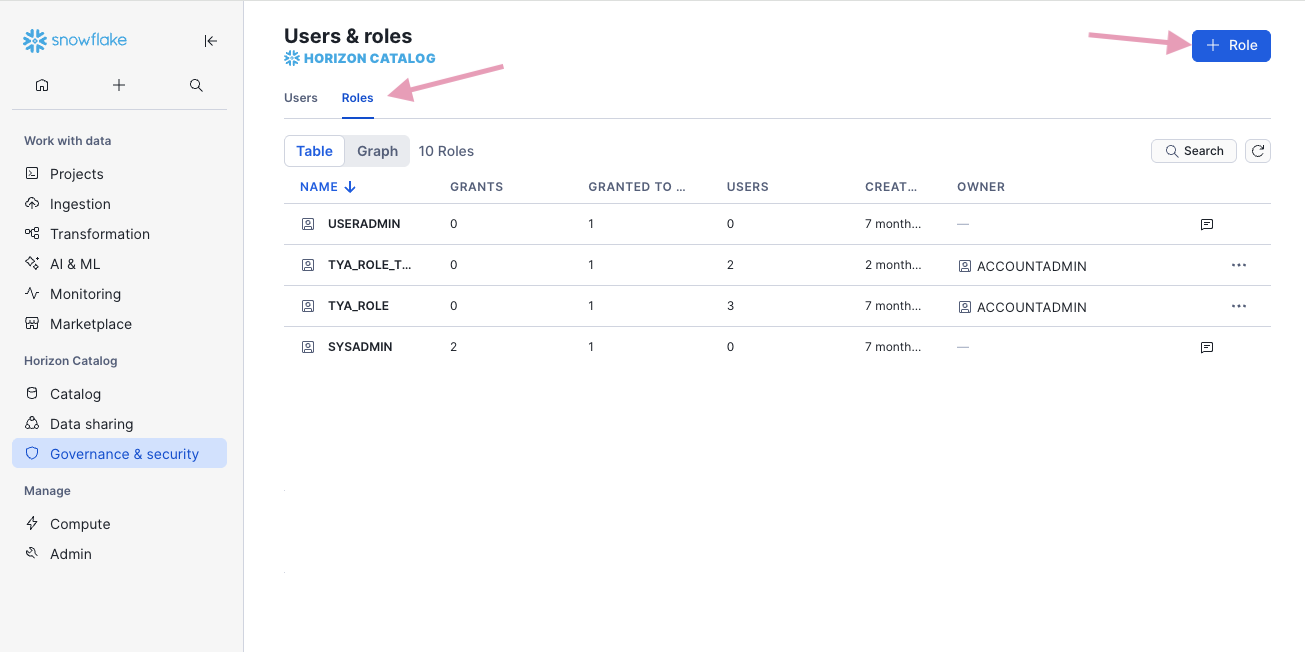
Open the Roles tab
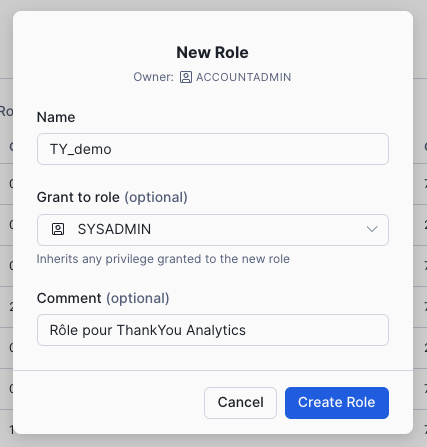
Create a new role "TY_xxx" inheriting from the "SYSADMIN" role.
Step by step
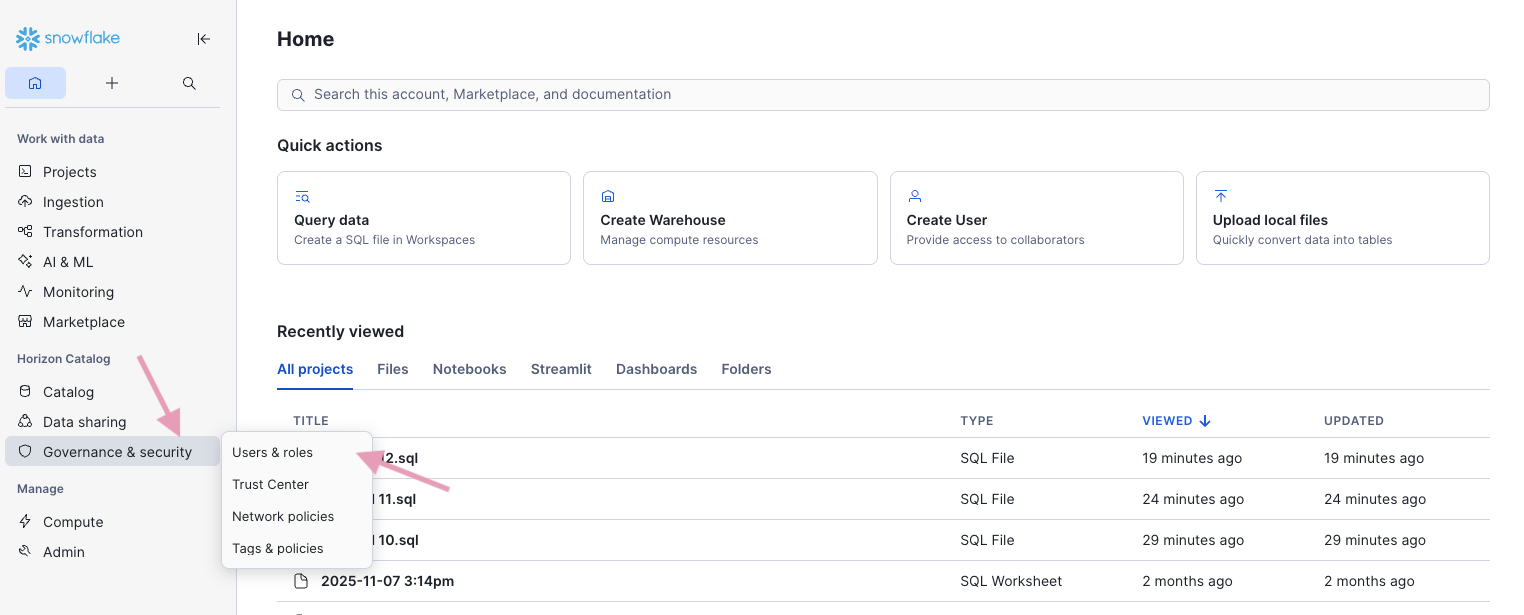
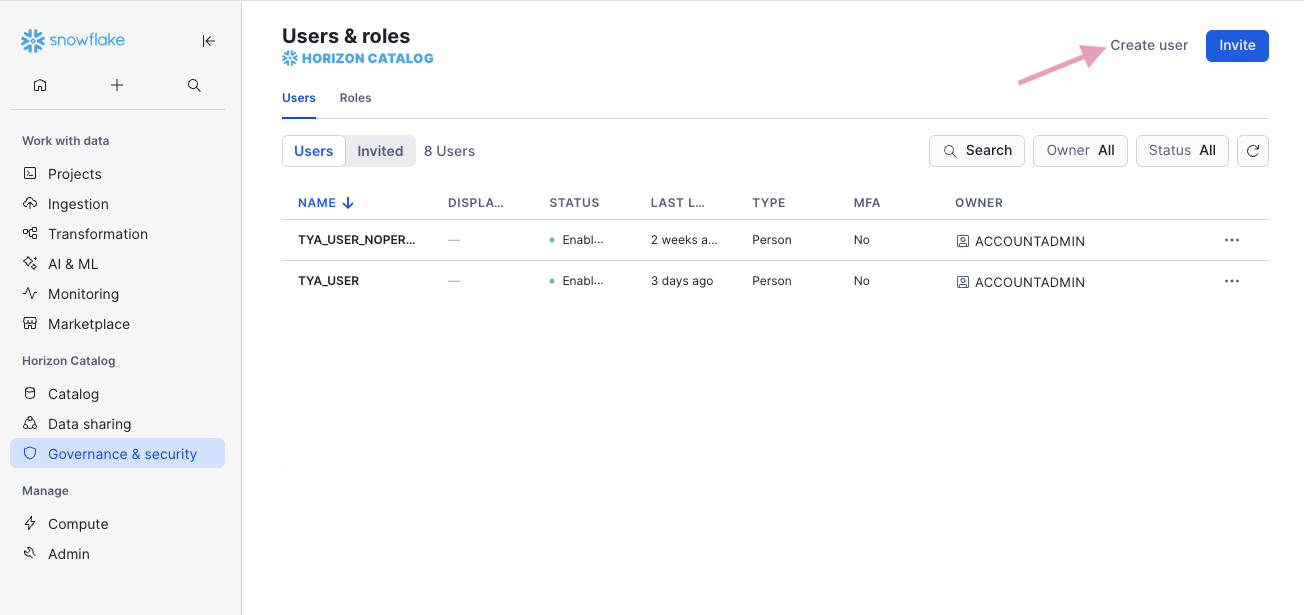
Follow this tree structure Home > Governance & security > Users & Roles
Open the Users tab
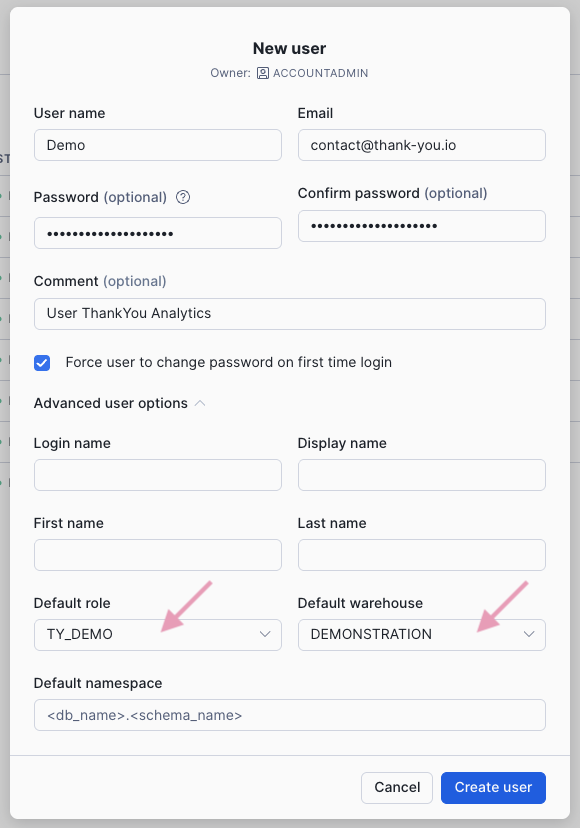
Create a new User
Give this user the previously created role and access to the chosen Warehouse, in the advanced options.
Step by step
This part lets you give the necessary privileges to the role created earlier.
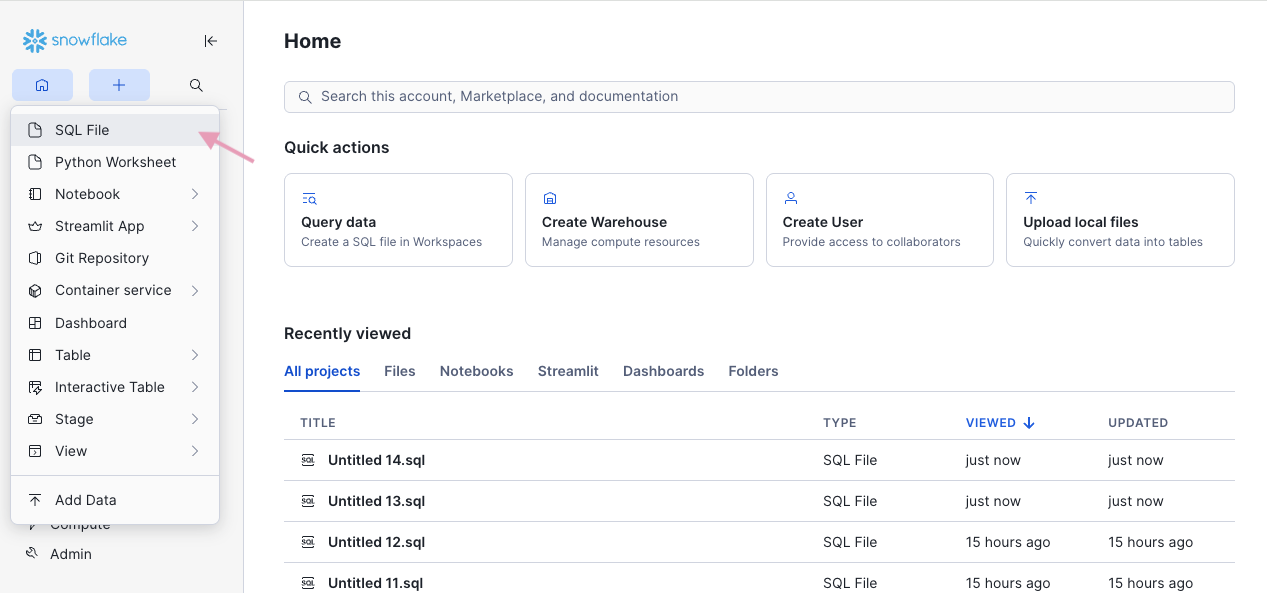
Follow this tree “+” > SQL File
Open the SQL tab
Open a new tab
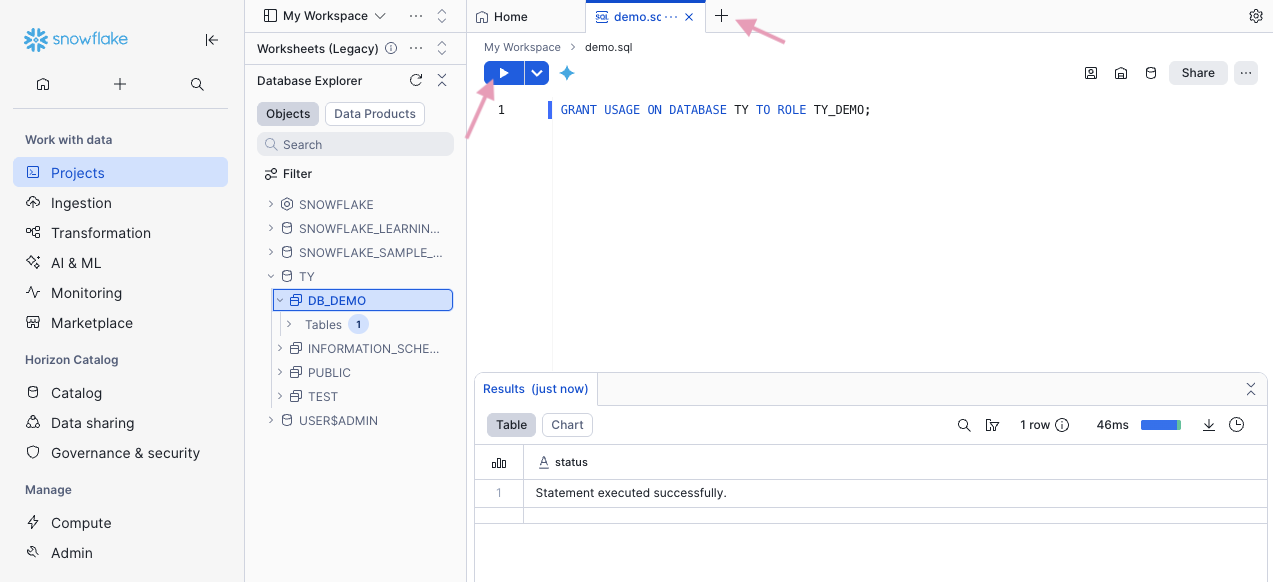
Run the SQL queries one after the other.
Replace the names of Database, Schema and Role
Find or create these items in the section Catalog > Database Explorer
List of SQL queries
1. Grant USAGE on the specific database GRANT USAGE ON DATABASE <database name> TO ROLE <role name>; |
2. Grant USAGE on the specific schema GRANT USAGE ON SCHEMA <database name>.<schema name> TO ROLE <role name>; |
3. Grant CREATE TABLE privileges in the schema GRANT CREATE TABLE ON SCHEMA <database name>.<schema name> TO ROLE <role name>; |
4. Grant permissions on all future tables in the specific schema GRANT SELECT, INSERT, UPDATE, DELETE ON FUTURE TABLES IN SCHEMA <database name>.<schema name> TO ROLE <role name>; |
4 bis. Grant permissions on all existing tables in the specific schema GRANT SELECT, INSERT, UPDATE, DELETE ON ALL TABLES IN SCHEMA <database name>.<schema name> TO ROLE <role name>; |
5. Link the ThankYou Analytics authentication key to the user ALTER USER <user name> SET RSA_PUBLIC_KEY="MIIBIjANBgkqhkiG9w0BAQEFAAOCAQ8AMIIBCgKCAQEAt9RymTNNqp15OS1q0Jfxj6KA75IZzoyZYkPAmzEo0AgIkISGo7VgGA639x/CidwGp/fHCQIN4ye5ht9Q4ovElggtrVNKXw0dSn6aCBlyIiTYvv+u0/wEcZ1kEytS2IEW3w3BfdcjedSd0DwYcToGdRmnqR5lbDJuZpOhoYKFB6RhO02hD7cdW1zZ7uXAc5kI1gMnDPEaMX2RPRlx+u2E3sYizRUhaEds1P0Zu+DLxRBSE+6YIOG364L4Z8L1RZYCIqc39OpUbTe9vg2tX5wm4r1XpJ5339sCOOvwGIOxRUphJR9fAMLfaMs6matIZlk4s9vvk64Xi1eUuexhzdszEQIDAQAB"; |
Step by step
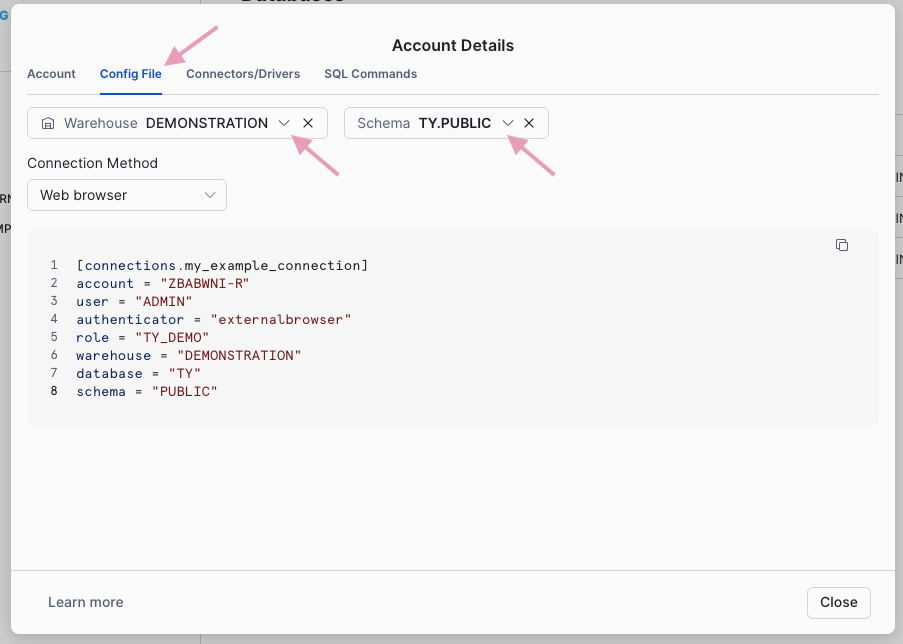
Please retrieve the following information to set up your automatic export in ThankYou Analytics.
Follow this path “account” > Connect a tool to Snowflake
Open the Config File
Select the dedicated warehouse and database.
Note the following information
ACCOUNT
USER
WAREHOUSE
DATABASE
SCHEMA
Step by step

 Your setup is ready
Once the setup is complete, head to the Automatic exports section of the ThankYou Analytics app to select the data to export and enable the export to your Snowflake.
Your next step:
Set up an automatic export to your Snowflake
With the information retrieved in part 4
Test the connection
Enable your exports
ThankYou Analytics automatic exports
Important information
The first tables can appear a few minutes after activation.